
How To Use CyberPanel On OpenLiteSpeed
Although OpenLiteSpeed doesn’t require a control panel service, we still recommend using one, especially if you’ve never used OLS before. For this, CyberPanel is a good choice because it will do most of the configuration for you, so you don’t need to stress with permissions, virtual hosts, or domain mapping.
In this article, I’ll show you how to use CyberPanel on OpenLiteSpeed. Let’s begin:
How To Use CyberPanel On OpenLiteSpeed
Basic Requirements
- Centos 7.x, Centos 8.x, Ubuntu 18.04, Ubuntu 20.04
- Python 3.x
- 1GB or more RAM.
- 10GB Disk Space.
Difference between CyberPanel and CyberPanel Ent?
CyberPanel comes in two flavors: one is simply called CyberPanel and the second is called CyberPanel Ent.
CyberPanel comes packaged with OpenLiteSpeed and is completely free for an unlimited number of domains and worker processes.
However, CyberPanel Ent comes packaged with LiteSpeed Web Server Enterprise and it’s free for only 1 domain.
Installing Cyberpanel
All the big VPS providers have a one-click installer available from the interface to install Cyberpanel, however, if yours doesn’t or you just want to get your hands dirty all you need to do is run the following command:
# sh <(curl https://cyberpanel.net/install.sh || wget -O - https://cyberpanel.net/install.sh)!!! The installation must be run as root (sudo will not work) !!!
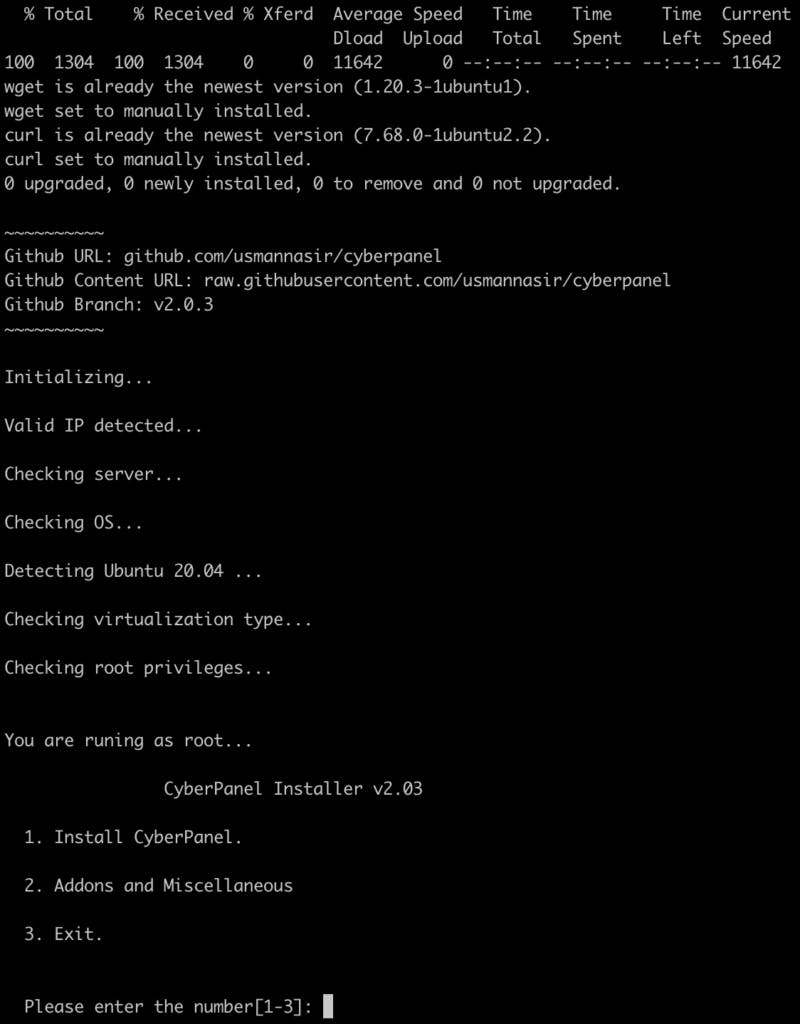
How to use Cyberpanel on Openlitespeed
After running the command you should see something similar to the image above.
Install choices
The installer has a few steps that you need to go through as follows.
Choose install action
This step lets you choose whether to install CyberPanel, CyberPanel Ent, or exit the installer.
Note: If you choose CyberPanel Ent, you need to first get a license even for the free tier. Check out the pricing table.
Install Full service for CyberPanel? This will include PowerDNS, Postfix and Pure-FTPd
This is a yes or no switch that will install some extra packages that will be used by the panel.
Do you want to setup Remote MySQL? (This will skip installation of local MySQL)
If you don’t want/have a remote MySQL instance, the installer will install a local instance and configure it for its use. However, if you already have an instance made for this purpose then you can choose yes and provide the connection credentials.
Setup admin password
You can either choose the default password which is 1234567, randomly generate one, or enter your own.
Choose optional installs
You can then choose if you want to use and install Memcache for cache purposes as well as Redis for object caching and other stuff.
Besides the two mentioned above, you also have the option to set up the CyberPanel watchdog which is in beta (or was in beta at the time this article was written).
Finally, the installer will proceed with installing CyberPanel on your system. However, keep in mind that depending on your server resources it may take 5 or more minutes.
While CyberPanel is being set up
As you wait for the installer, you can make sure that your firewall or security group has the following ports open:
- TCP: 8090 for CyberPanel
- TCP: 80, TCP: 443, and UDP: 443 for webserver
- TCP: 21 and TCP: 40110-40210 for FTP
- TCP: 25, TCP: 587, TCP: 465, TCP: 110, TCP: 143, and TCP: 993 for mail service
- TCP: 53 and UDP: 53 for DNS service
Testing it out
After the successful installation you can access CyberPanel using the details below:
1https:<IP Address>:8090
2
3Username: admin
4
5Password: 1234567 (or the password you set)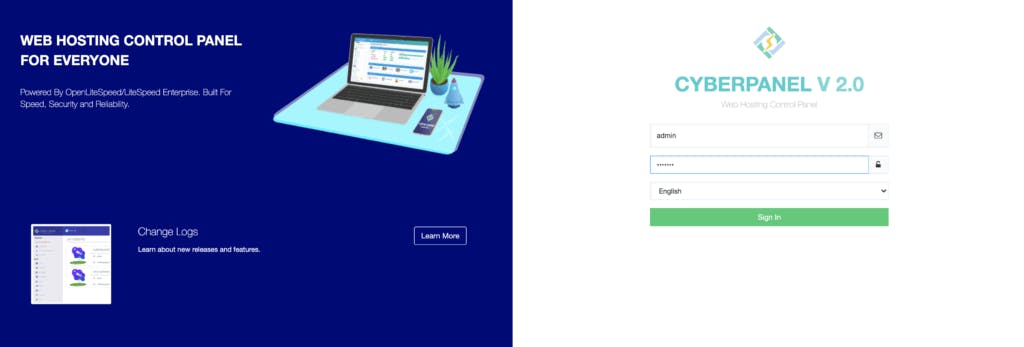
How to use CyberPanel on Openlitespeed
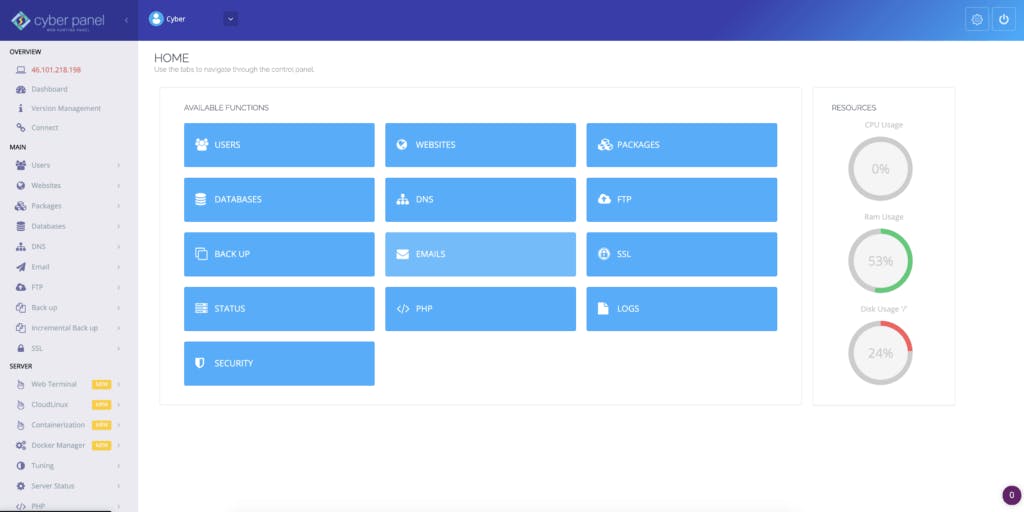
How to use CyberPanel on Openlitespeed
503 Error After Install
If you get a 503 error after installing CyberPanel, you can do one of the following things.
1. Check LSCPD Status
# systemctl status lscpdIf LSCPD is not running, start LSCPD using:
# systemctl start lscpd2. Manually set up virtualenv
1# source /usr/local/CyberCP/bin/activate
2
3# pip install --ignore-installed -r /usr/local/CyberCP/requirments.txt
4
5# deactivate
6
7# virtualenv --system-site-packages /usr/local/CyberCP
8
9# systemctl restart lscpd
3. Install Logs If after this you are still having issues, you can try to find errors in the install logs, they are located at:
# /var/log/installLogs.txtAnd this is how you use CyberPanel on OpenLiteSpeed. Pretty easy, right? You just need to follow a few simple steps.
Now, what if I told you you could do this even easier, with Bunnyshell? Because Bunnyshell automates repetitive processes, you could run this installation with minimal coding requirements.

