How to Start Remote Development on a PyTorch Environment
This is a follow-up of the article How to Launch your AI Project with PyTorch in Minutes Using Bunnyshell Templates. It’s a step-by-step guide on setting up remote development on the PyTorch environment with Bunnyshell CLI.
Please note that this guide assumes that you have already completed all the necessary steps from the previous article. Without completing those steps, you won’t be able to follow the instructions in this guide.
Step 1. Install Bunnyshell CLI for Remote Development
For Mac
Use the following command to install Bunnyshell CLI:
$ brew install bunnyshell/tap/bunnyshell-cliFor Windows and Linux
- Download from Github Releases the appropriate archive for your architecture on the releases page.
- Then, un-archive it and run the binary.
Step 2. Create a CLI profile
Using the Bunnyshell access token that you can get here, you can set up a CLI profile for easy access to your account using the following command:
$ bns configure profiles addNote: It is not mandatory to provide any of the requested parameters. It will prompt you to choose a name, organization, environment, and component (frontend or backend) to make it easier to work with remote development later on.
Step 3. Start Remote Development on PyTorch Environment
To begin remote development, navigate to the deployed environment from “PyTorch Environment Template” that you created in Step 1, and there, click on the “Remote Development��” button.
Copy the command from the “Remote Development Instruction” page or modify the command below by replacing “Public ID” with the actual Public ID from your environment in Environment details from Bunnyshell.
$ bns git prepare --environment "Public ID" - discard-history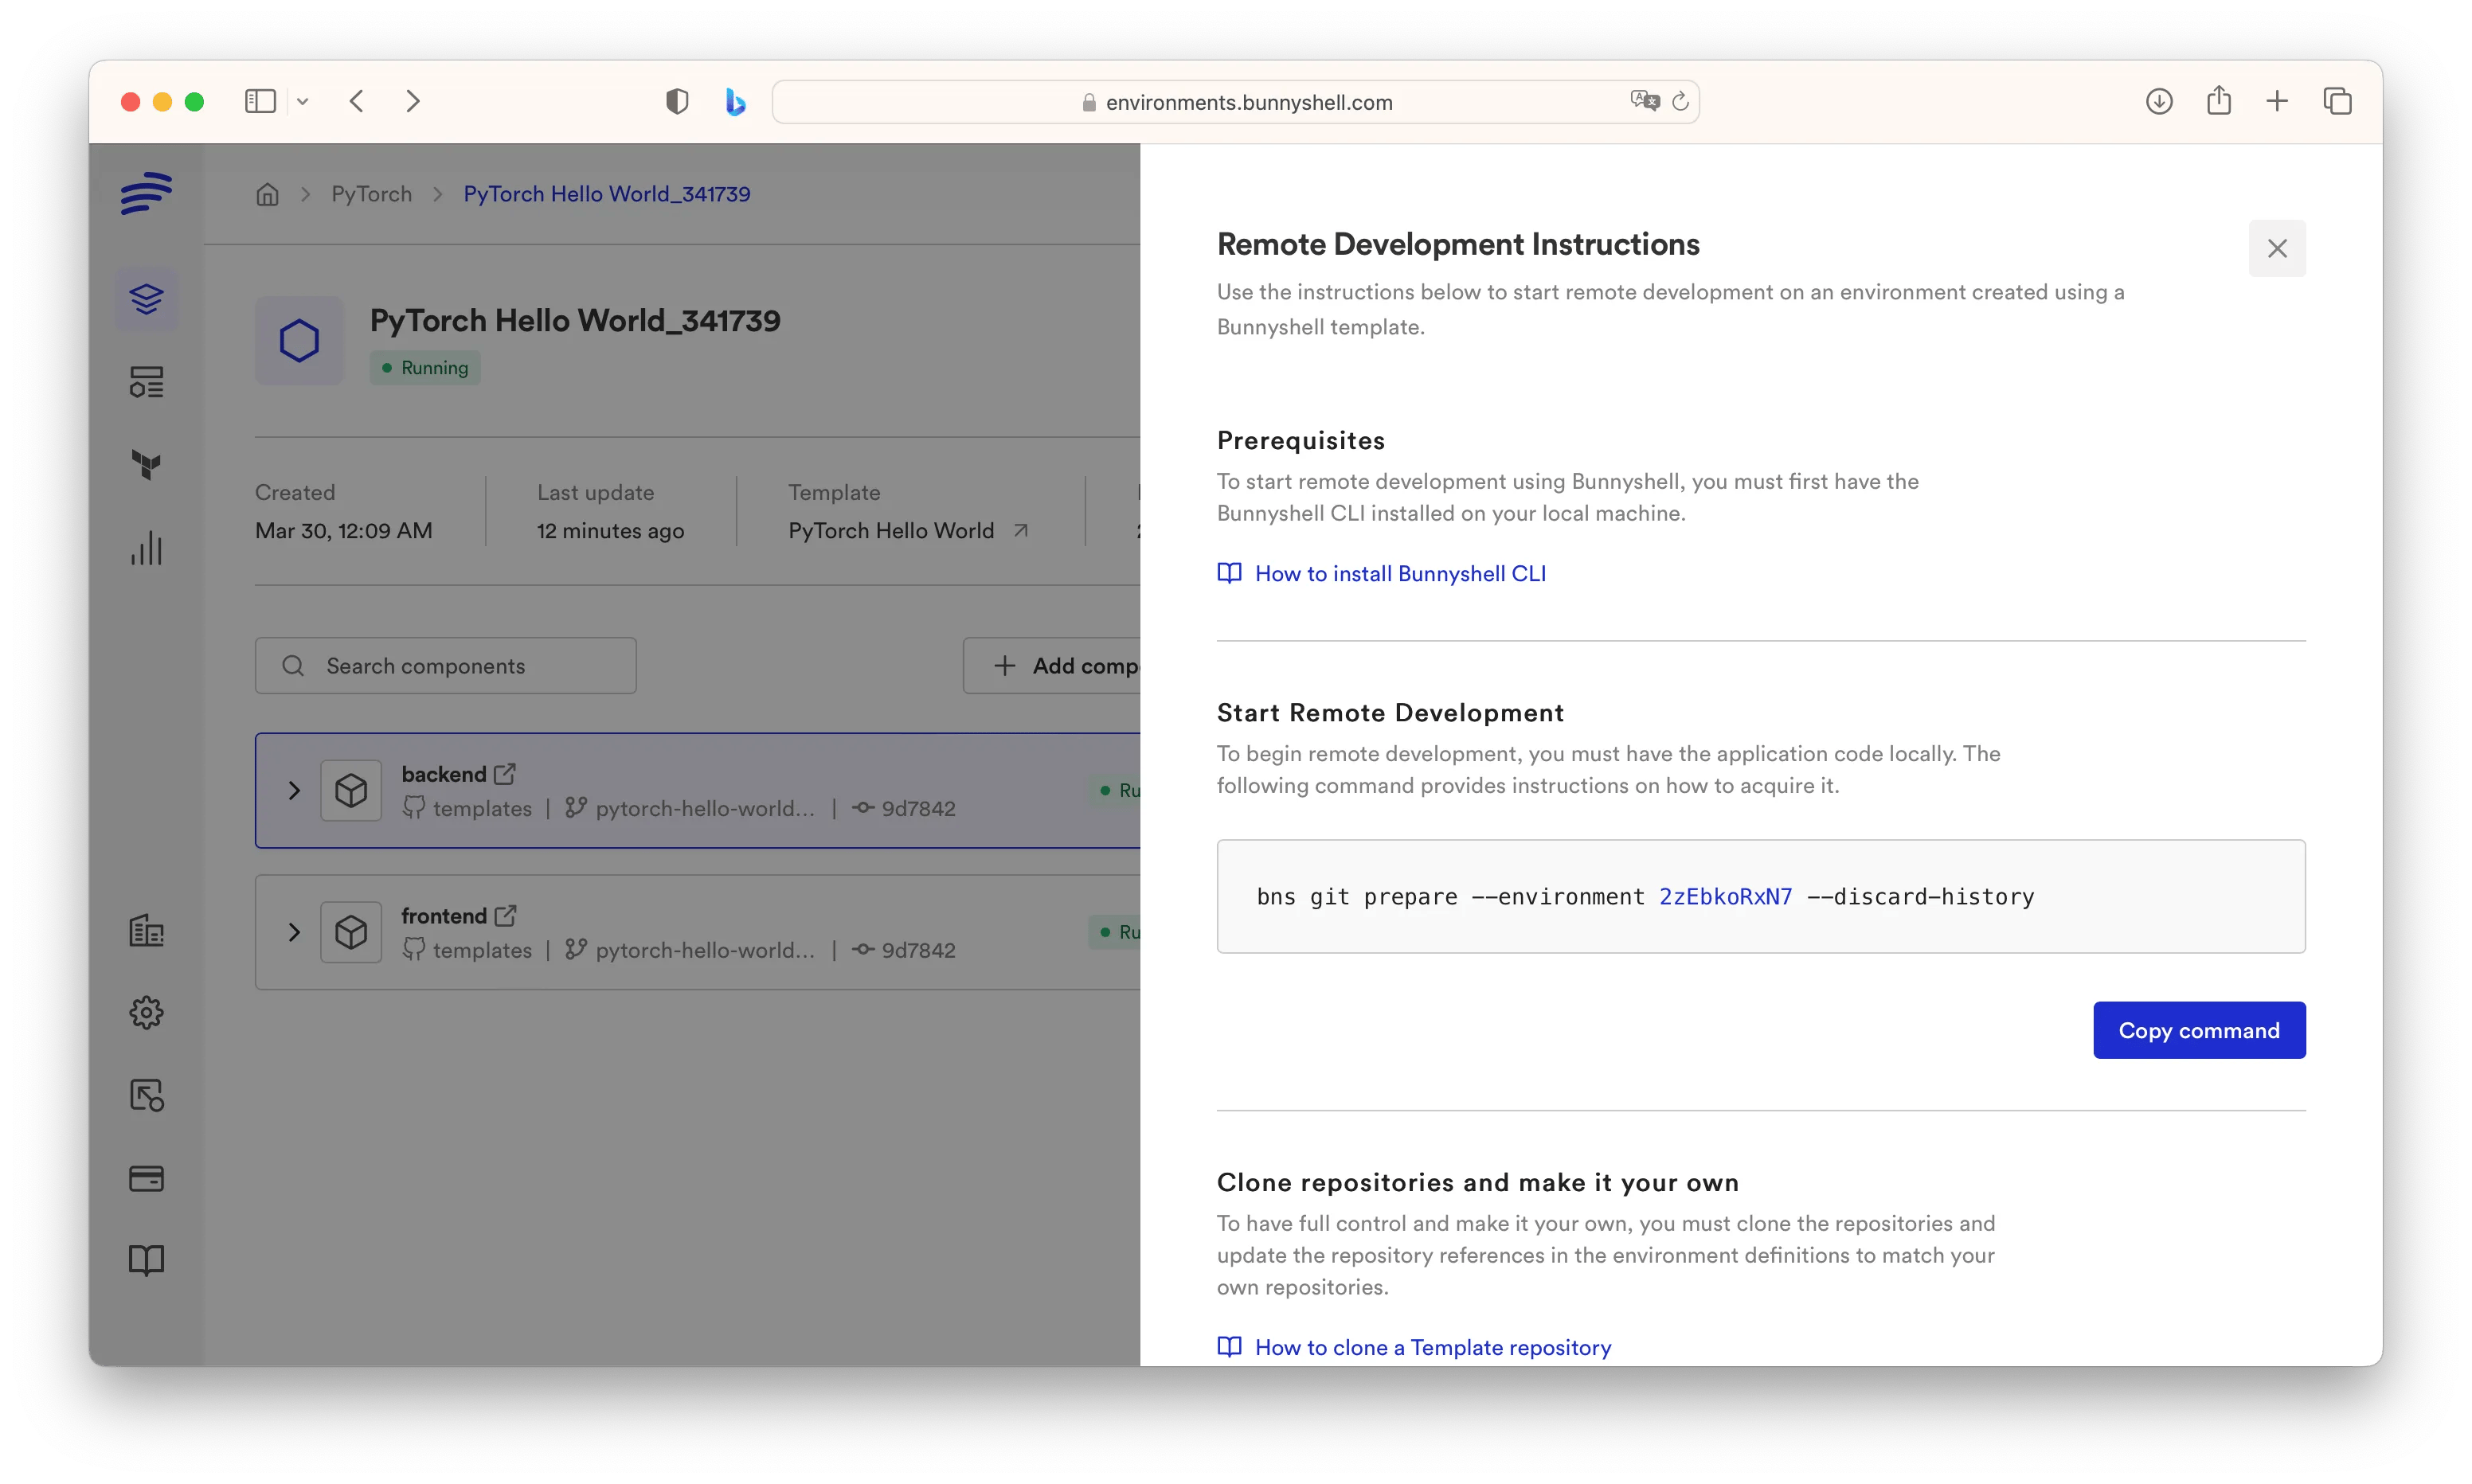
After running the command above, you will receive two commands:
1) Clone repositories command:
1git clone \
2--separate-git-dir=$ (mktemp -u) \
3--depth 1 \
4https://github.com/bunnyshell/templates.git templates \ && rm -f templates/.git
Note: This command will clone the Bunnyshell repository on your local device. There, you will find both frontend and backend components.
2) Start remote development command:
We recommend running this command from the specific folder where the app is located locally.
In our case, it is one of the following folders:
for frontend is templates/components/pythorch-hello-world-frontend
for backend is templates/components/pythorch-hello-world-backend
$ bns rdev upOnce you have run the command, you need to provide two paths:
- the local path, for your local code files. If you have run the command within the folder, the path will be pre-filled; otherwise, you need to define it.
- the remote path: For the backend application, it’s /app. For the frontendapplication, it’s /usr/share/nginx/html
When the pod is ready, the following message will appear:pod is ready for Remote DevelopmentYou will remain in a shell within the container. There, you will need to manually start the application.
3) Start the app command:
for frontend
$ nginxfor backend
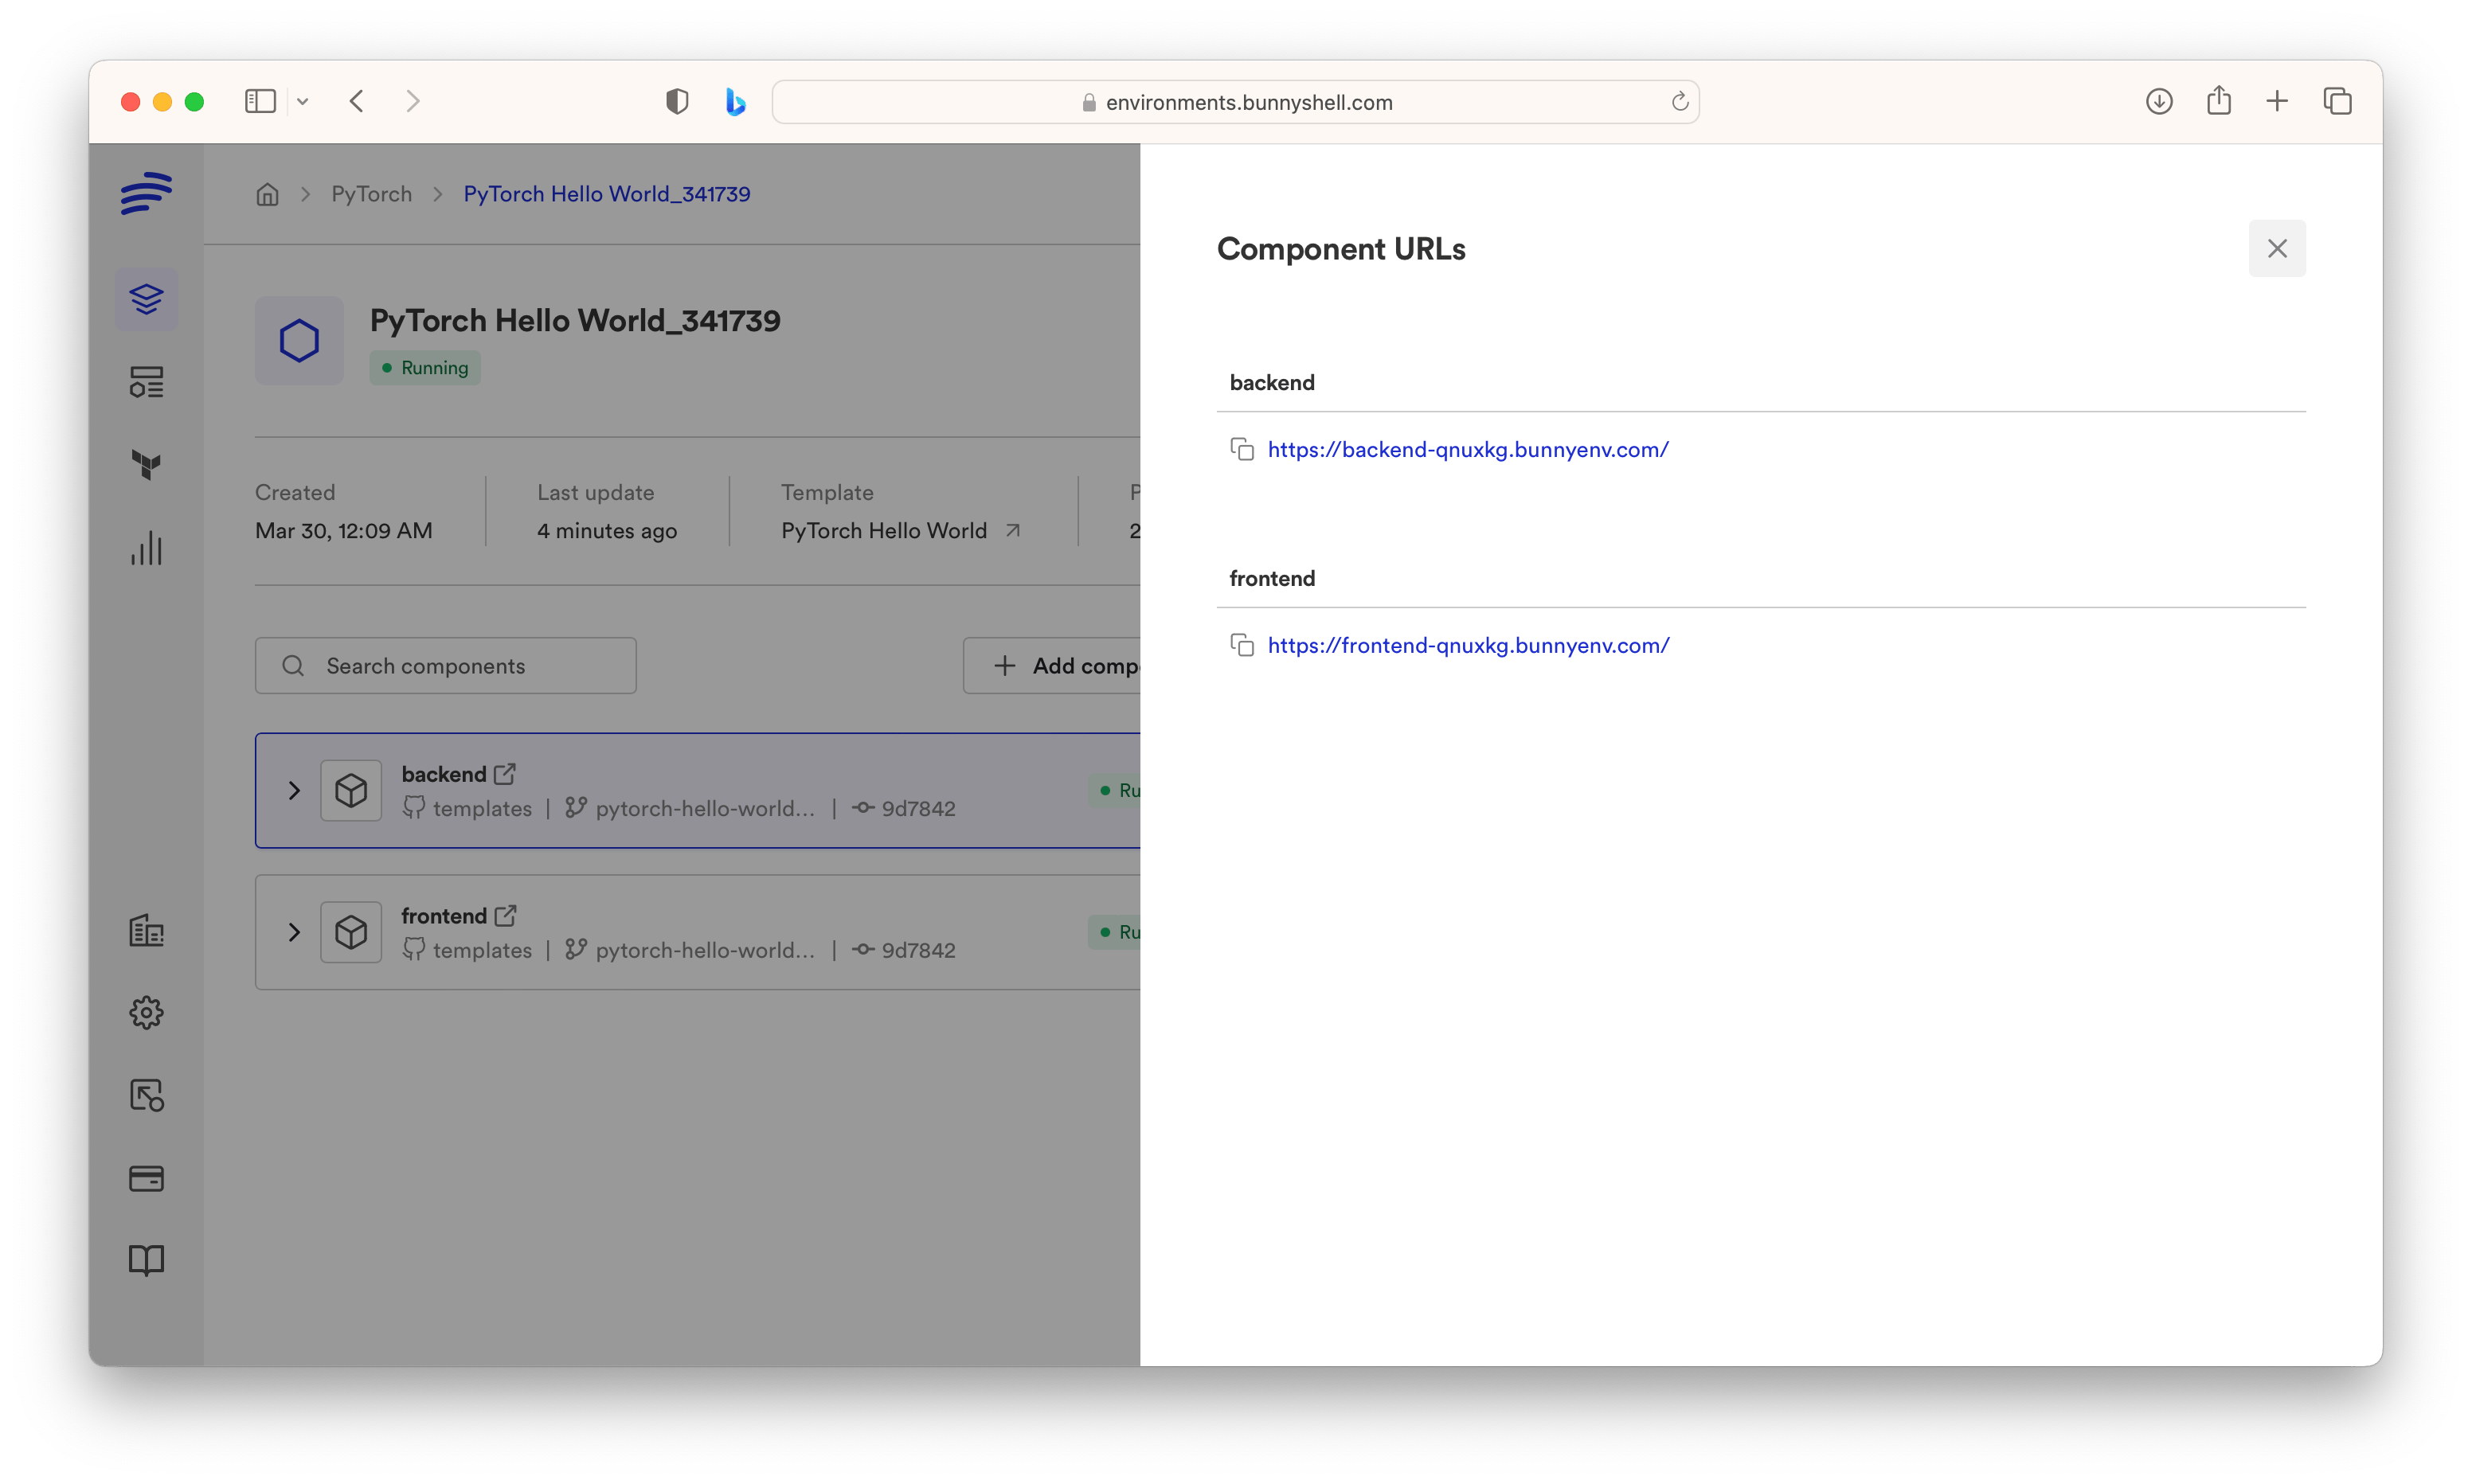
$ python app.pyNow you can modify the code and then check changes in the URLs that you can find in the URLs button from the Environment details in Bunnyshell.
One more thing.
Close remote development command:
Exit with the command:
exitand then close remote development with command:
$ bns rdev down